Step 1: Access the RuConnect Platform**
Open the RuConnect platform at https://ruconnect.in/Step 2: Navigate to the Dashboard
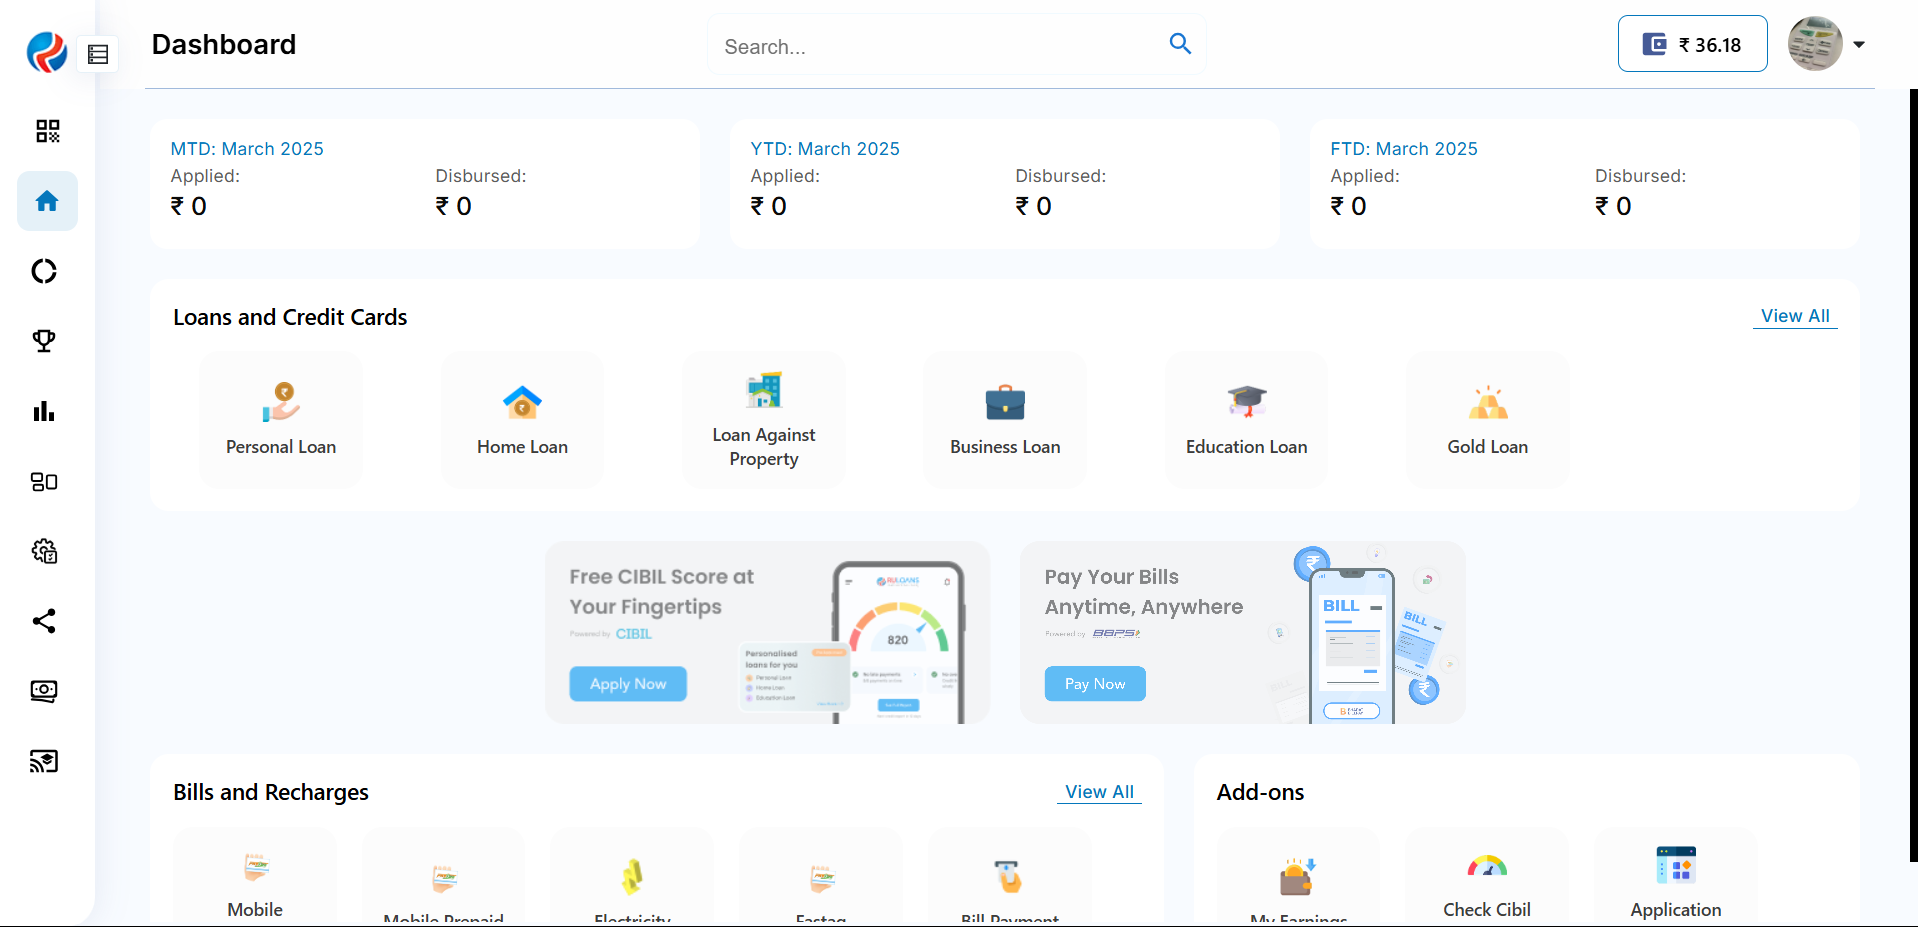
- After successful login, you will land on the Dashboard.
- The Dashboard provides:
- Quick Access Links: Links to personal loans, home loans, and other products.
- Status Overview: Displays details of ongoing or past applications
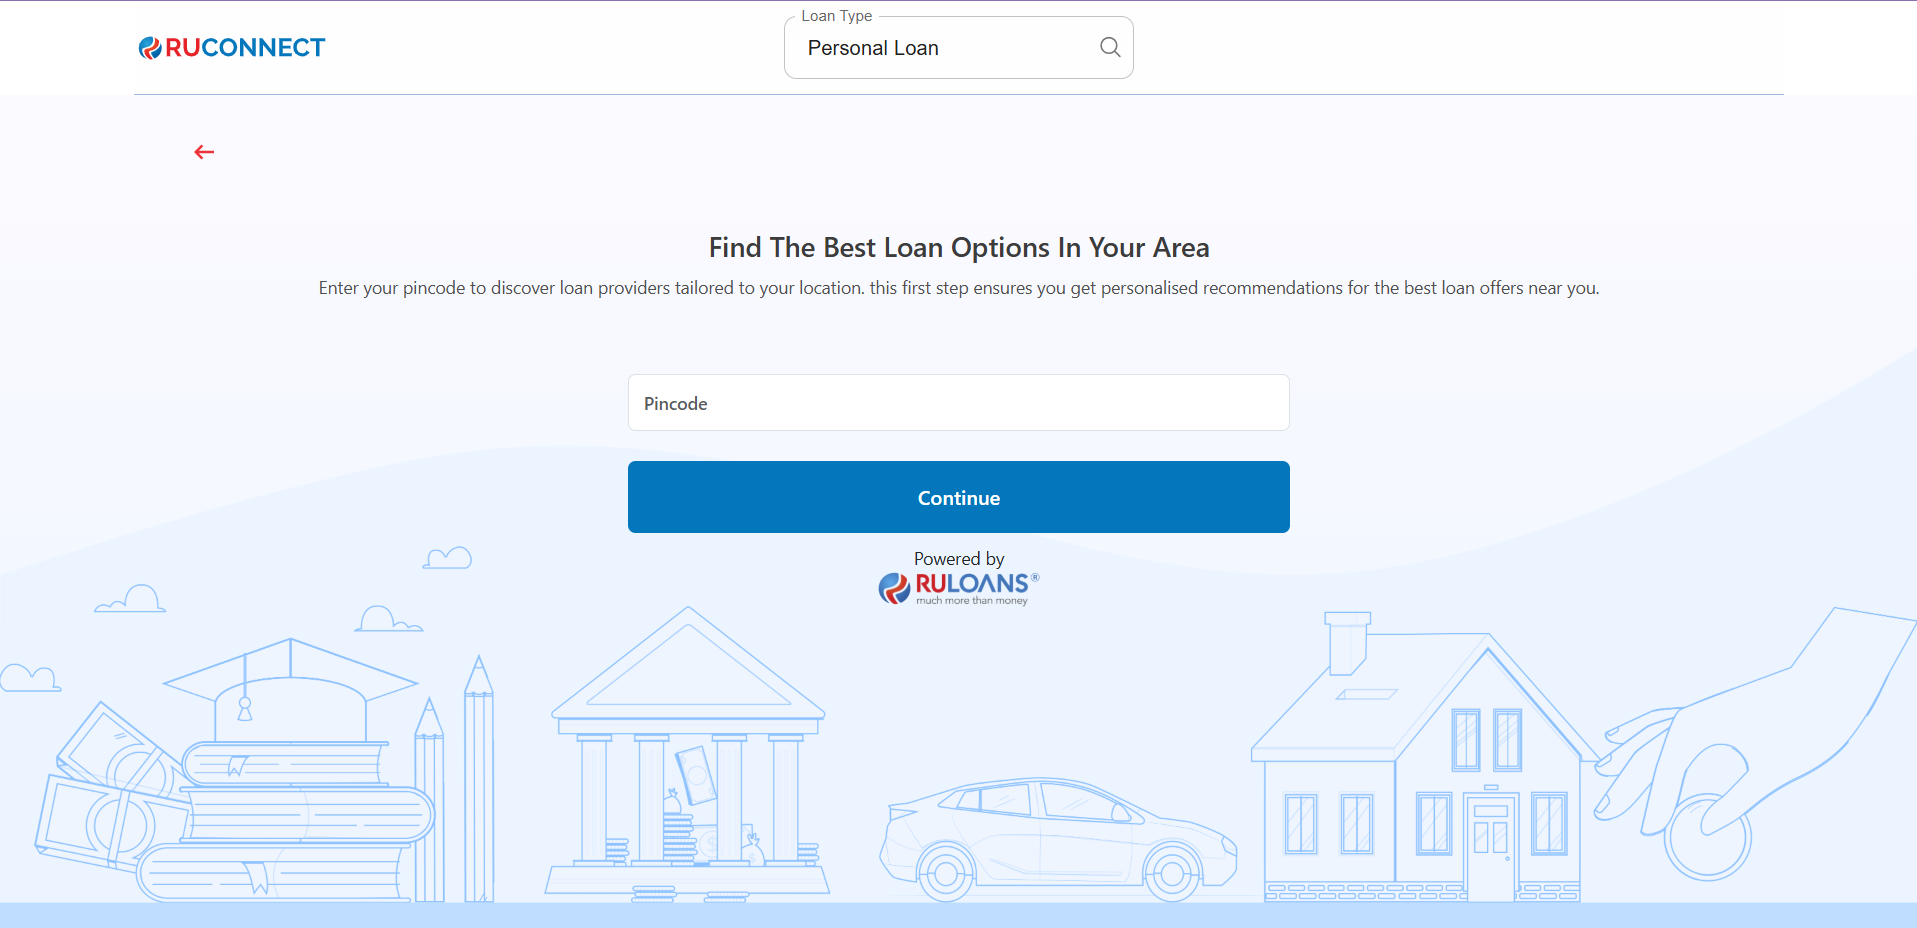
Step 3: Enter Your Pincode
- Pincode: Enter the 6-digit postal code of your residence or business address.
This helps us verify your location and show eligible offers. - Tap Continue.
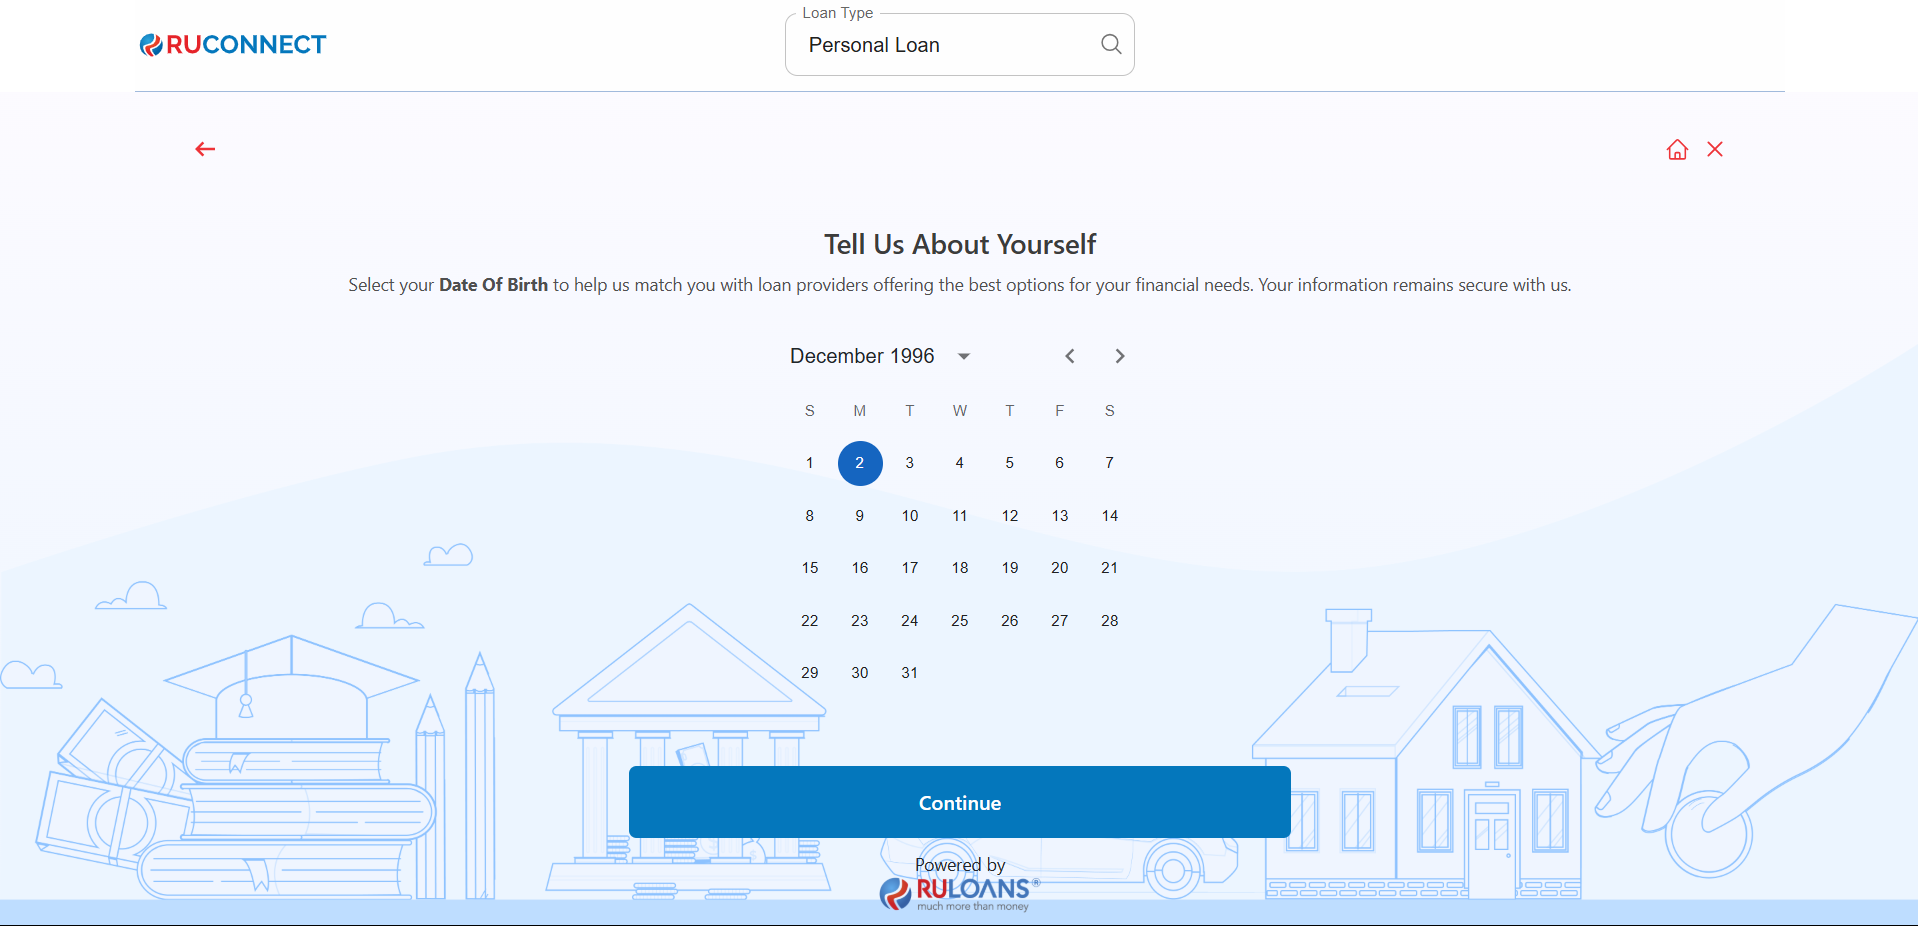
Step 4: Enter Your Date of Birth
- Date of Birth: Select your date of birth using the calendar picker.
This helps determine your eligibility and age-based offers. - Tap Continue.
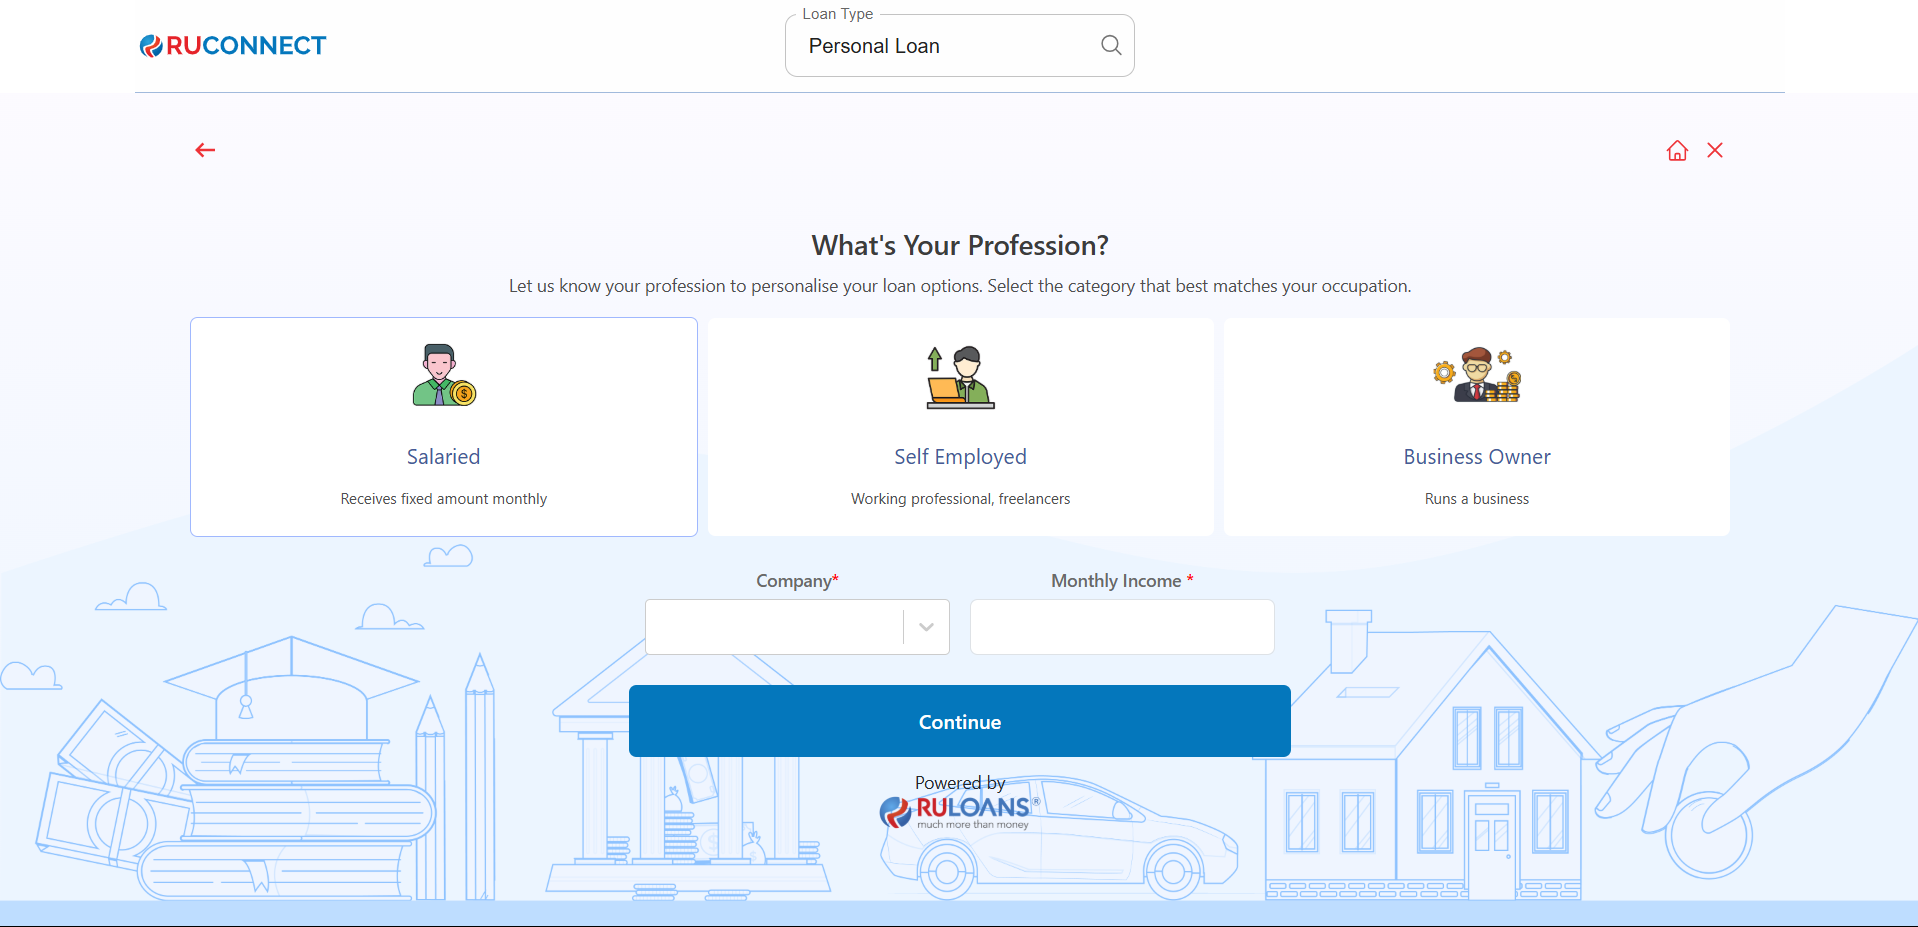
Step 5: Choose Your Profession
Select the category that best describes your employment type:- Salaried - If you work for a company or organization.
- Self-Employed - If you are a freelancer, consultant, or professional.
- Business Owner - If you run a business, either registered or informal.
If Salaried:
- Company Name: Name of your employer.
- Monthly Income: Your average take-home salary each month.
If Self-Employed or Business Owner:
- Business Name / Company Name: Name of your business or profession.
- Business Turnover: Approximate annual income from your business/profession.
- Business Vintage (in months): How long you’ve been running it.
- Monthly Income: Your average net income per month.
- Tap Continue.

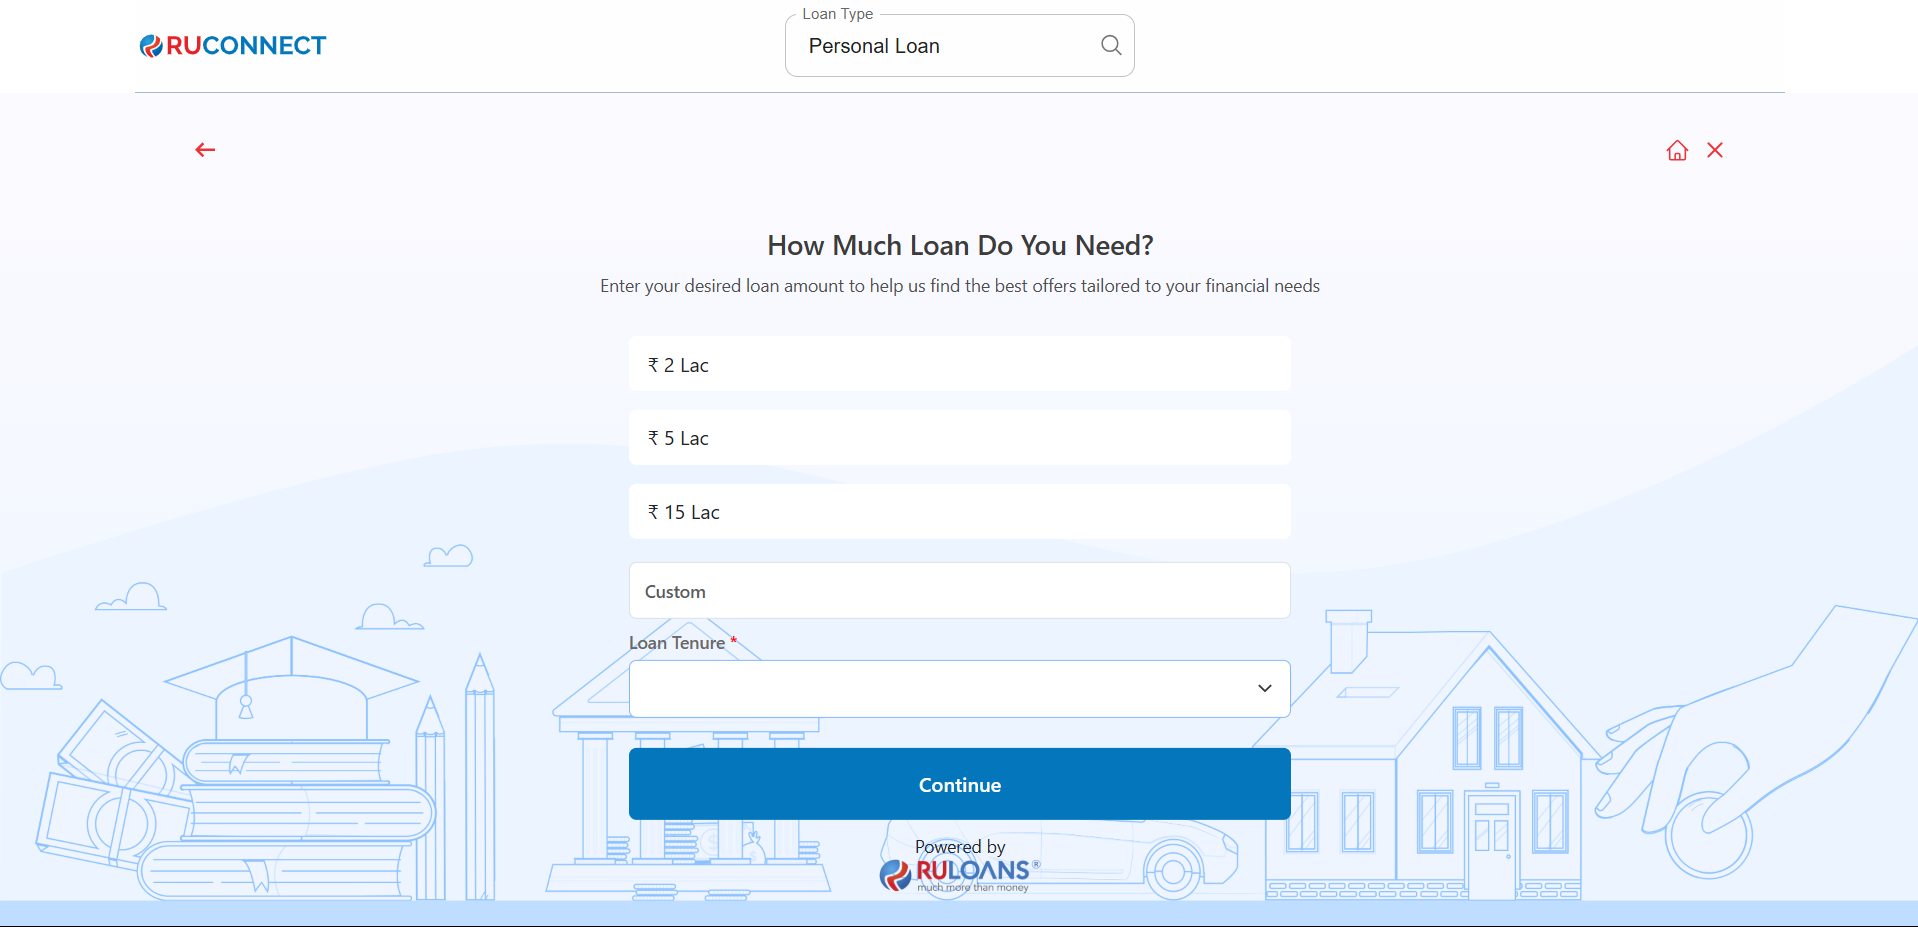
Step 6: Select Loan Amount & Duration
- Loan Amount: Choose a preset amount (e.g., ₹ 2L / ₹ 5L / ₹ 15L) or enter a Custom Amount.
- Loan Tenure: Choose the repayment period (in years).
- Tap Continue.
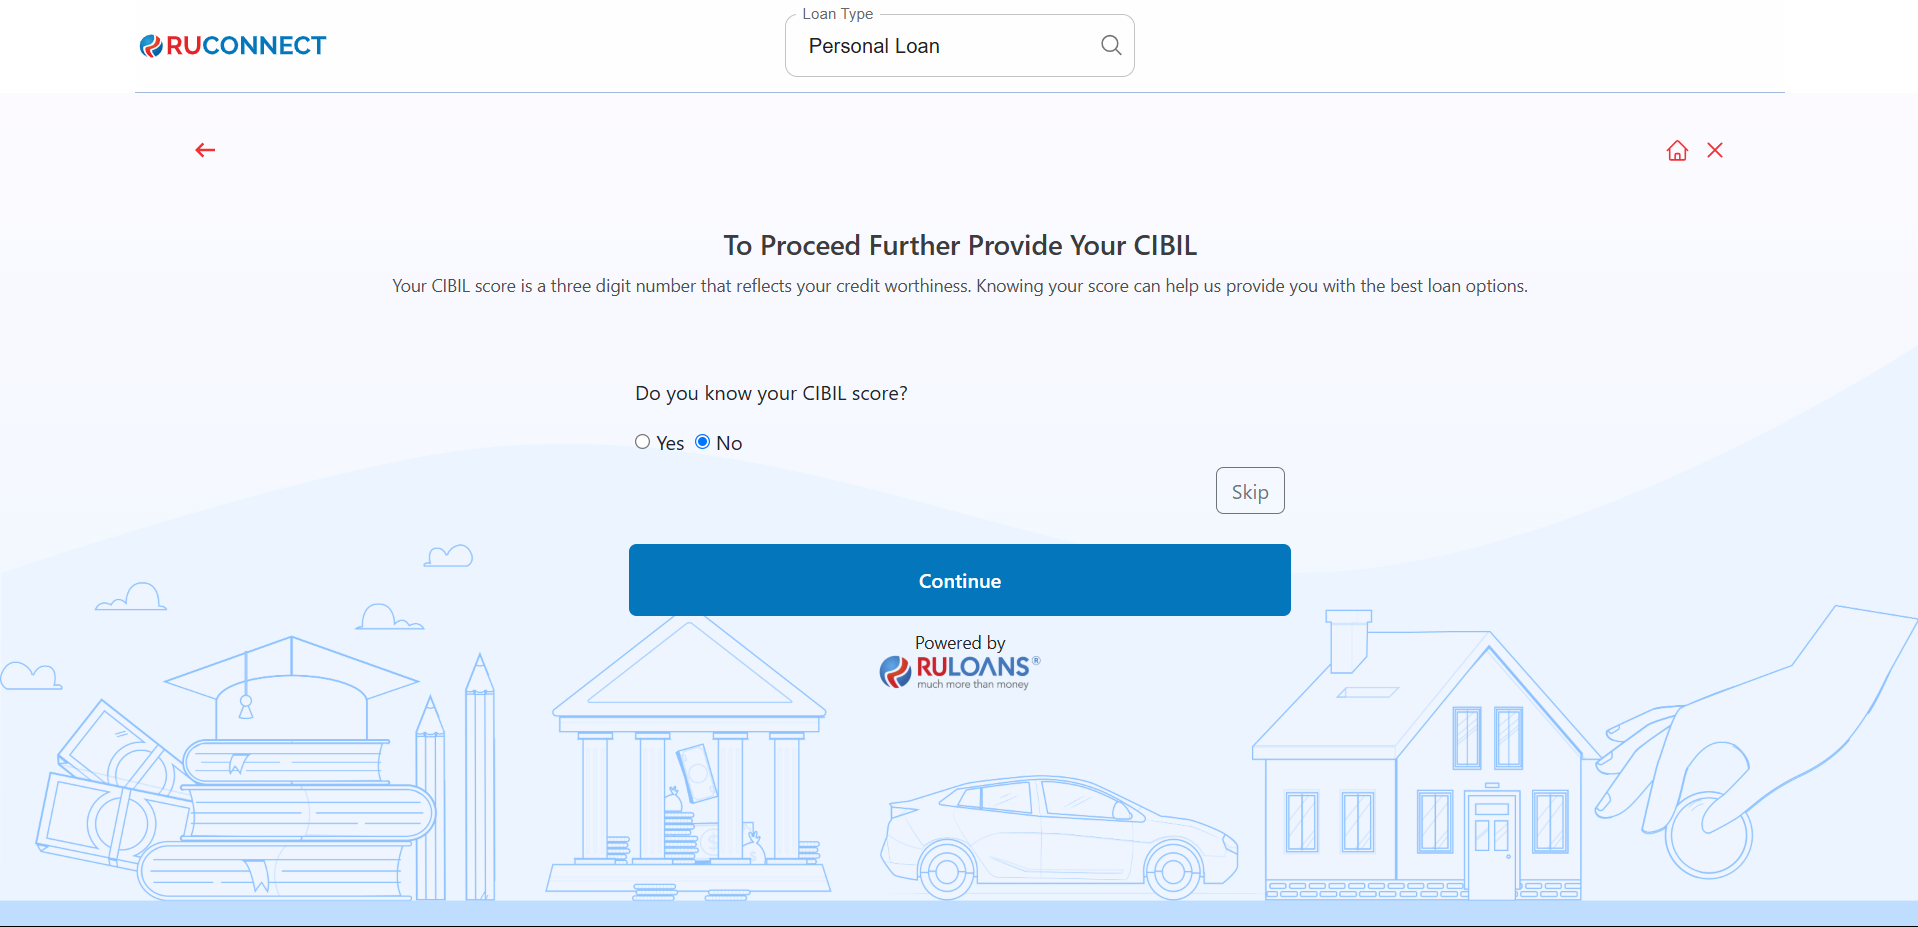
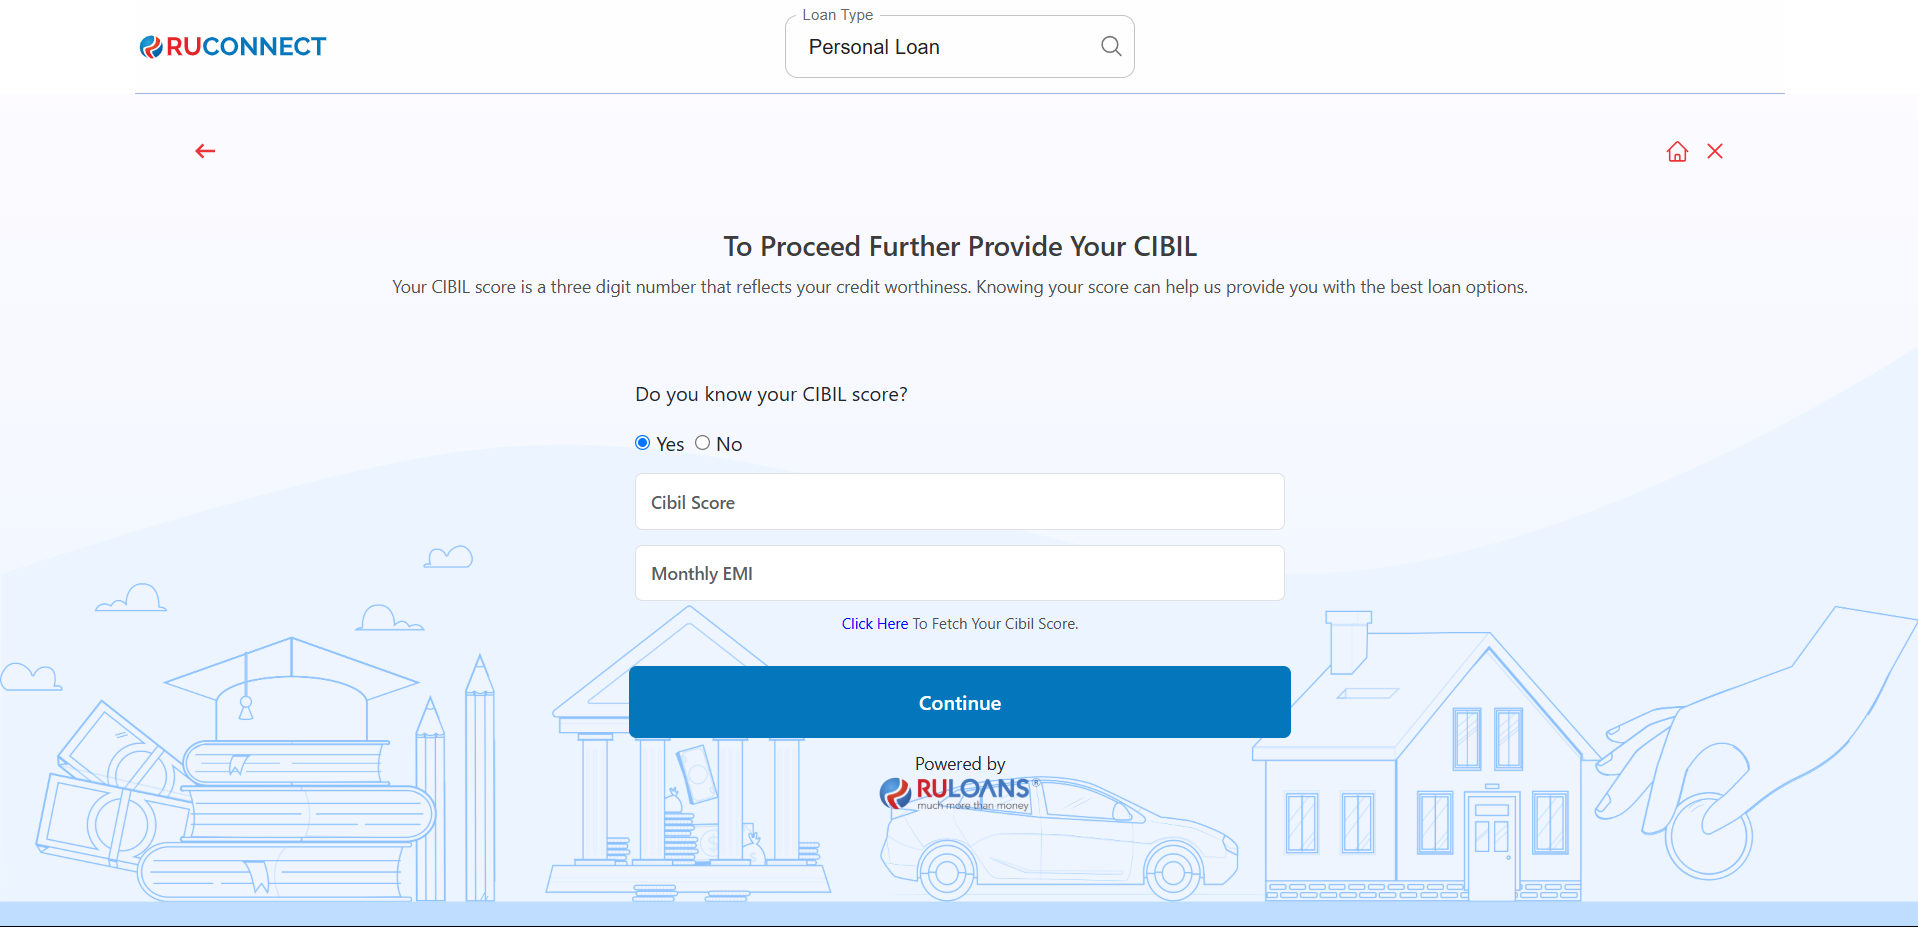
Step 7: Know Your CIBIL Score?
-
If you select Yes:
- CIBIL Score: Enter your 3-digit credit score (e.g., 750).
- Monthly EMI: Total of all active loan EMIs you’re paying.
- If you select No: User will be redirected to Step 8.
- If you Tap Skip: User will be redirected to Step 10.
- Tap Continue.
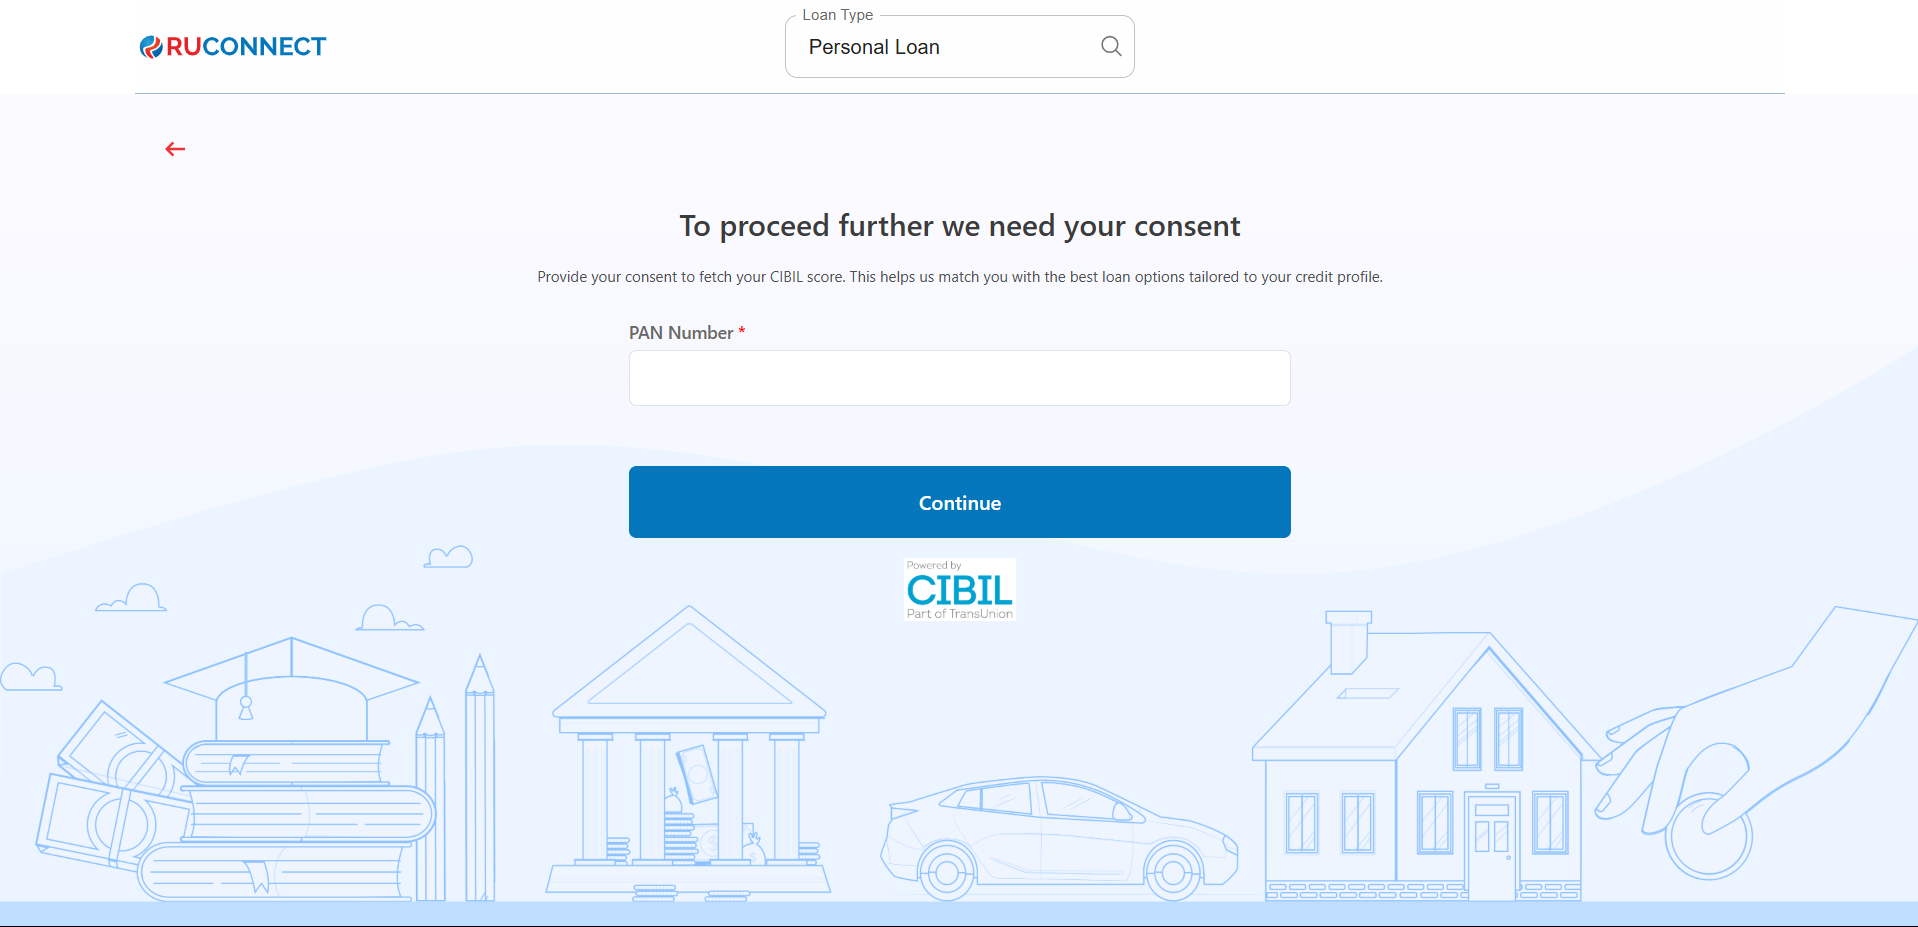
Step 8: Enter PAN Number & Give Consent
- PAN Number: Enter your 10-character PAN (e.g., ABCDE1234F).
Required to verify your credit score and match loan offers. - Tap Continue.
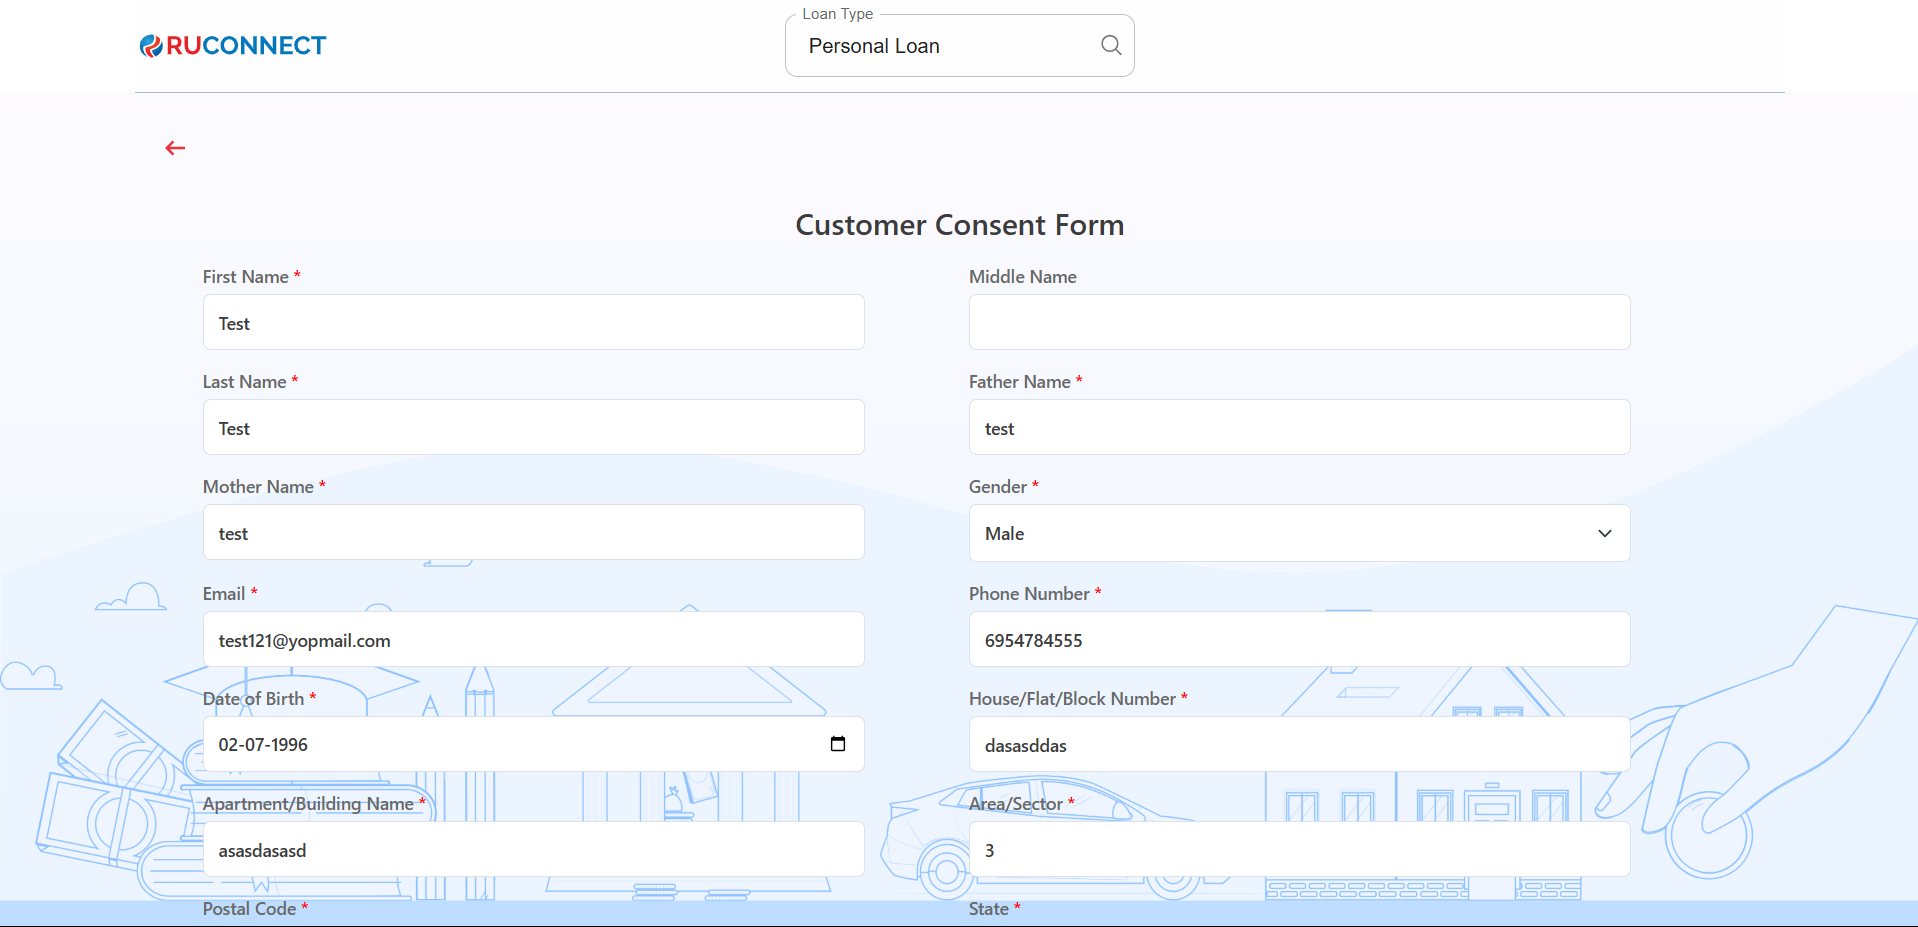
Step 9: Fill Personal & Address Details for CIBIL
Personal Details- First Name: Enter your First name.
- Middle Name: Enter your Middle name (optional).
- Last Name: Enter your Last name.
- Father’s Name: Enter your Father’s full name.
- Mother’s Name: Enter your Mother’s full name.
- Gender: Select your gender from the dropdown.
- Email ID: Enter your email ID.
- Mobile Number: Enter your mobile number.
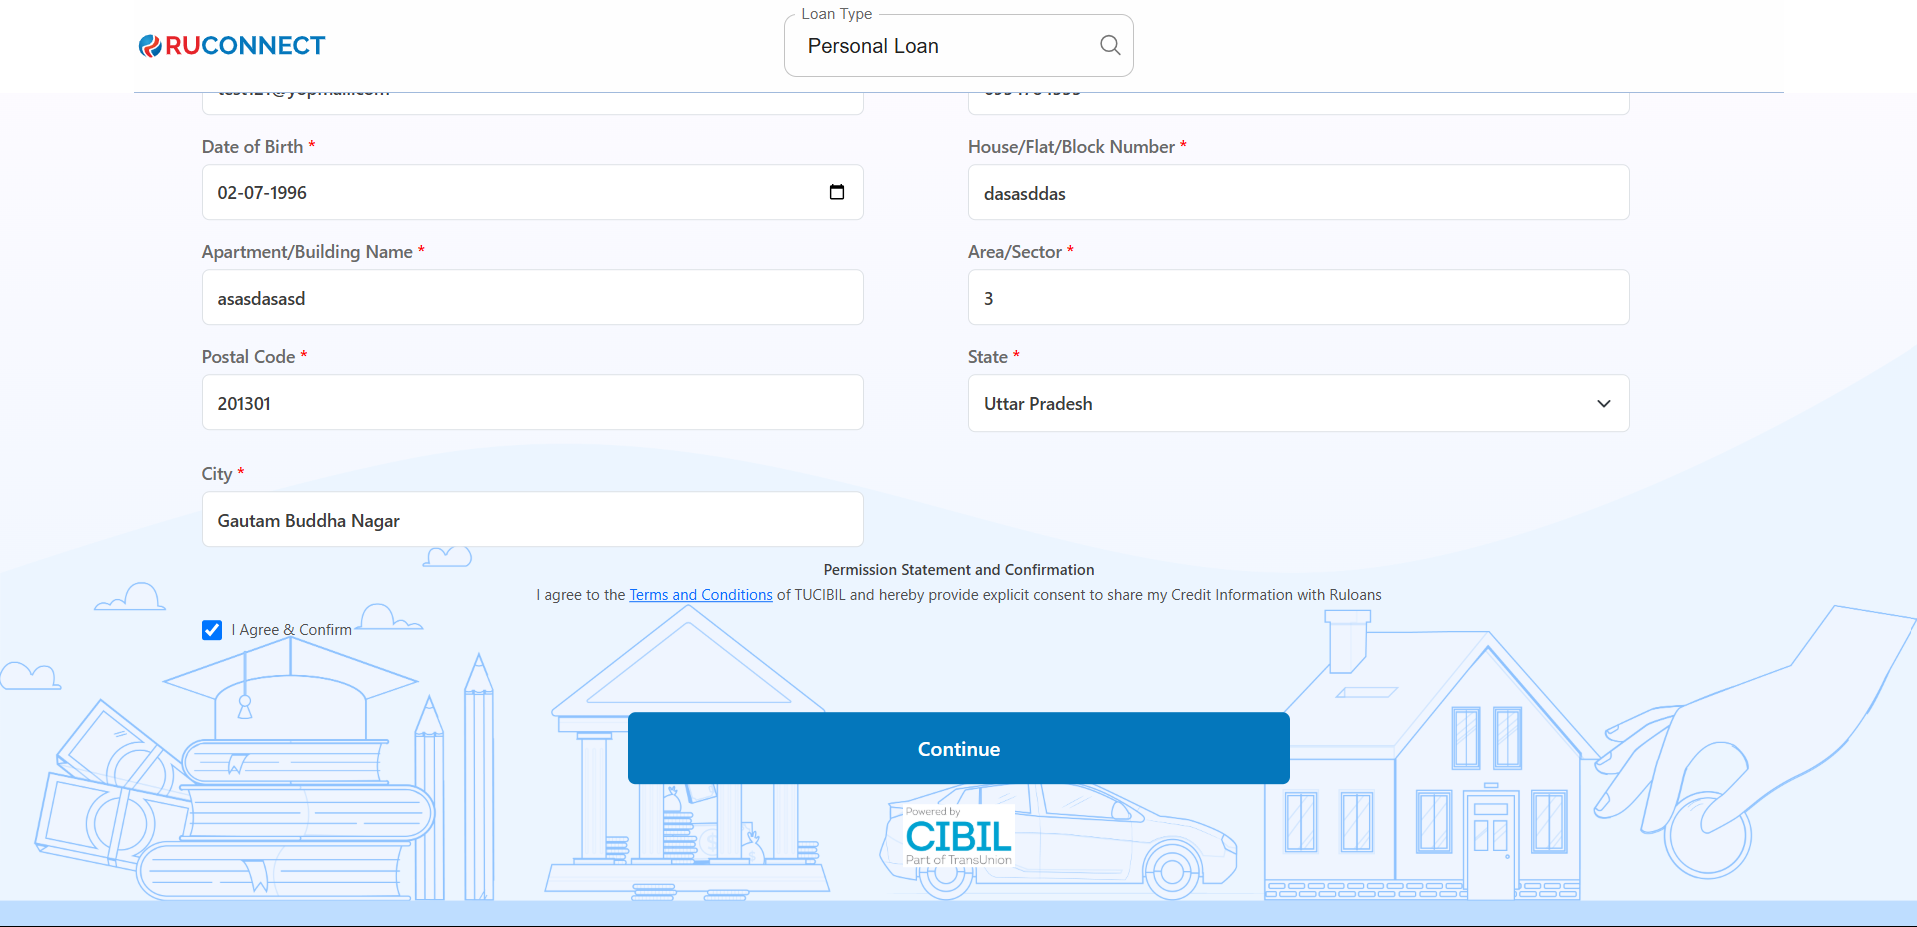
- Date of Birth: Enter your date of birth.
- House / Flat / Block Number: Enter the house/flat/block number of the address.
- Building / Apartment Name: Enter the building/apartment name of the address.
- Area / Sector: Enter the area/sector of the address.
- Pincode: Enter the pincode of the address.
- City: Select the city from the dropdown.
- State: Select the state from the dropdown.
You may review the Terms & Conditions.
Tap Continue
Step 10: Get Your Recommended Offers
- Based on your details, view loan offers from lenders like:
- Hero Fincorp, HDFC, Tata, Piramal, and more.
 When the user clicks on the “Know More” CTA the user will redirect to the another screen where usre can check the following loan details process like: Summary of Charges, Loan Process, List of Documents, Key Facts Statements (KFS)
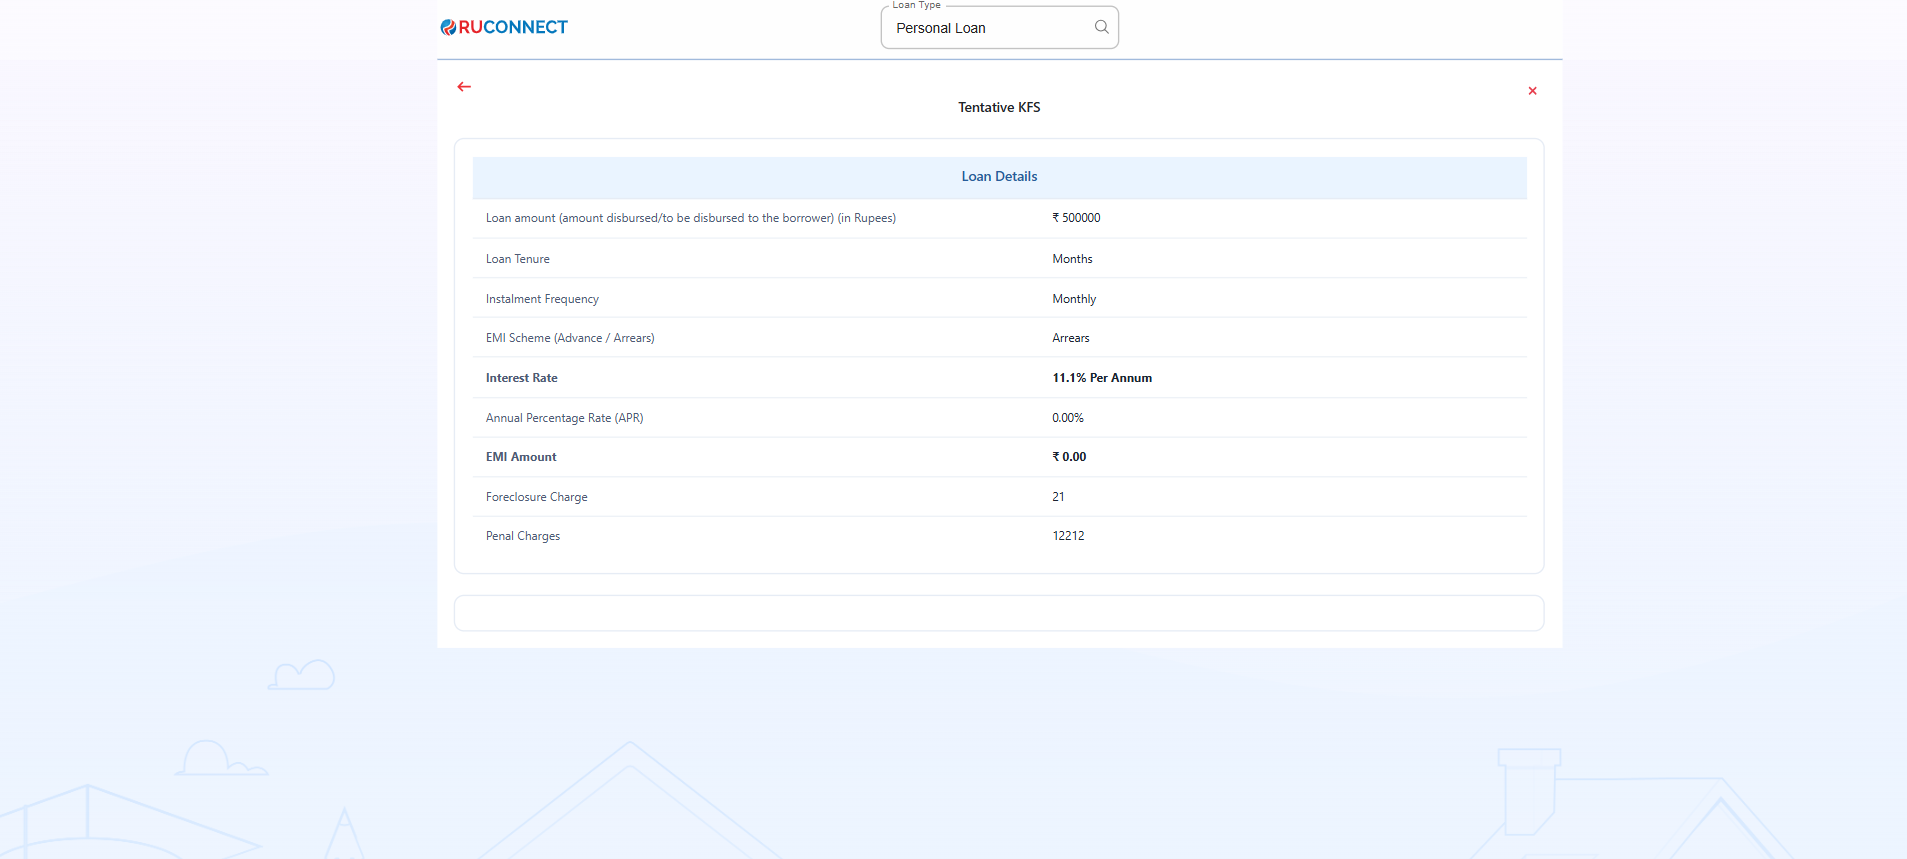
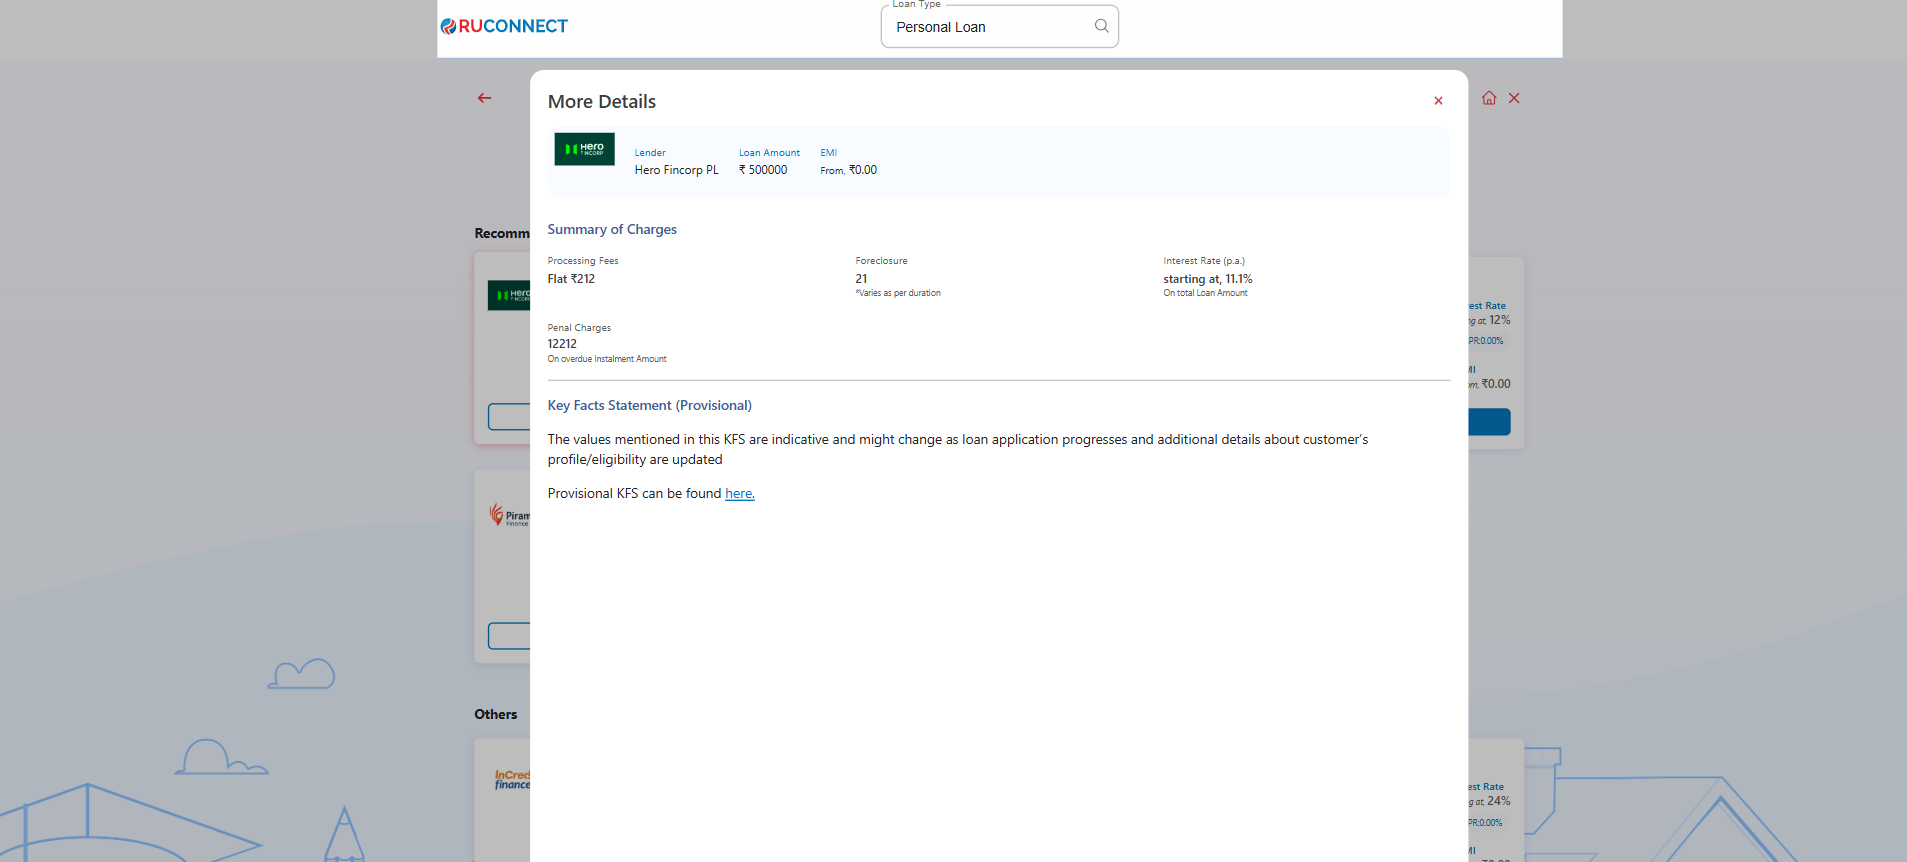 After redirecting to the “More Details” Screen when the user clicks on “Provisional Key Facts Found here” the user will redirect to the KFS Screen where user can check the following detils like: Loan Details & Charges
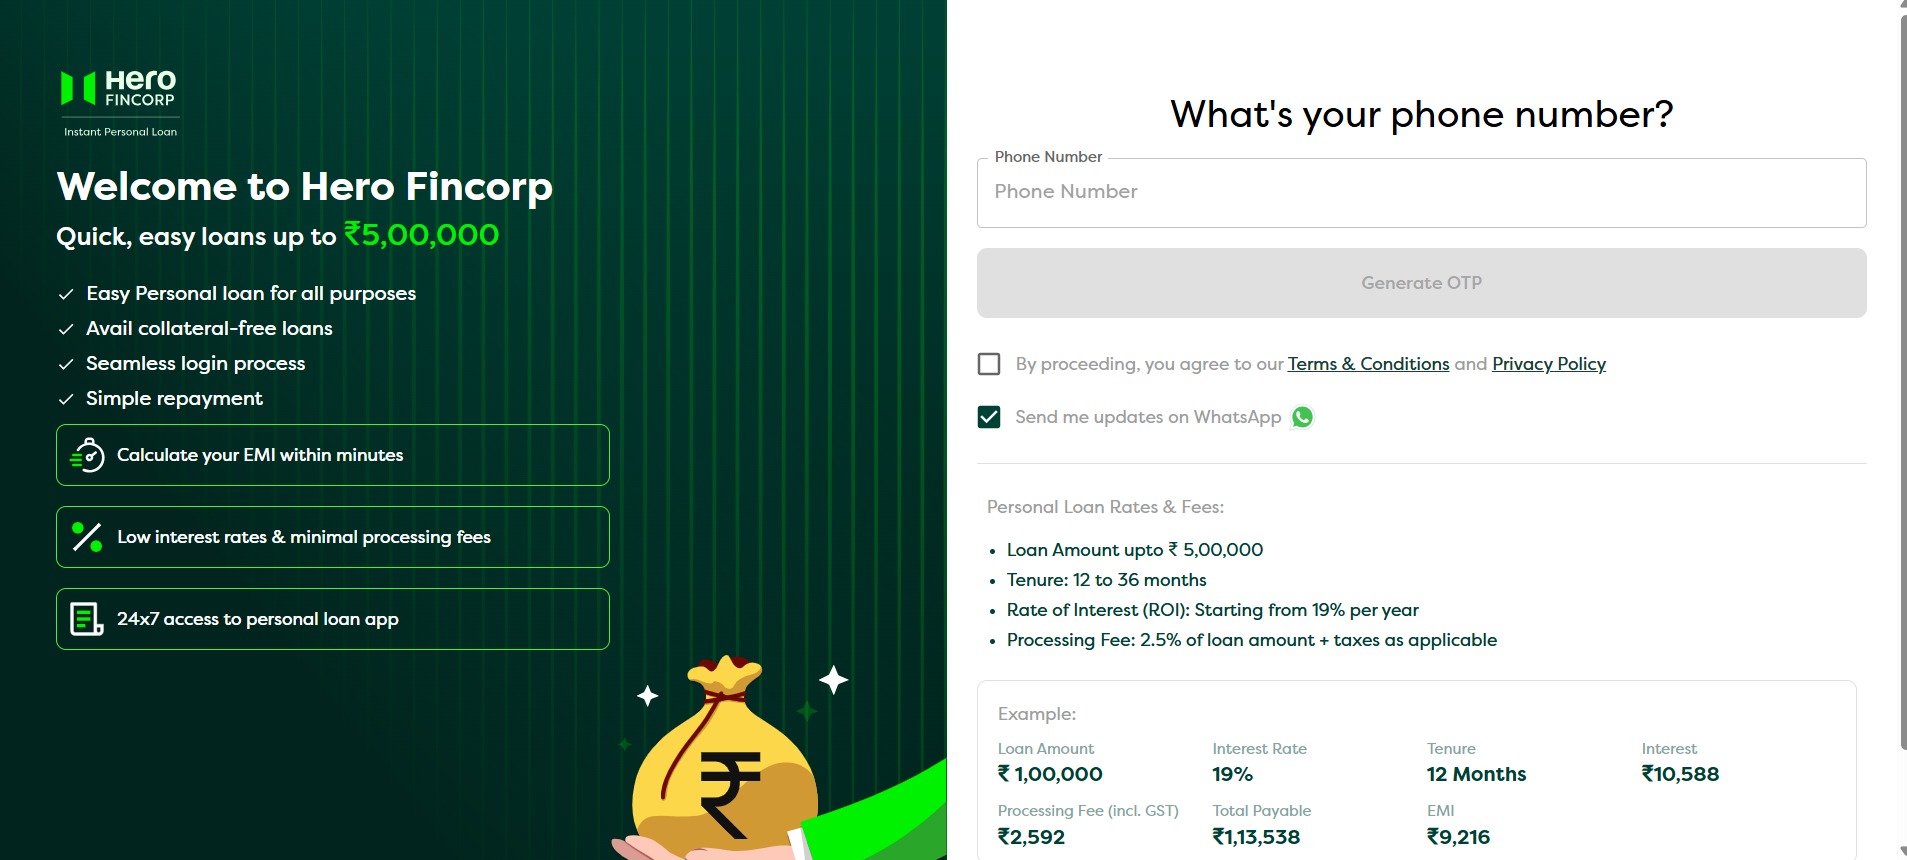
Step 11: Customer PAN & Mobile Number Entry
This screen is used to collect the customer’s mobile number and PAN (Permanent Account Number), which are essential for identity verification and loan processing.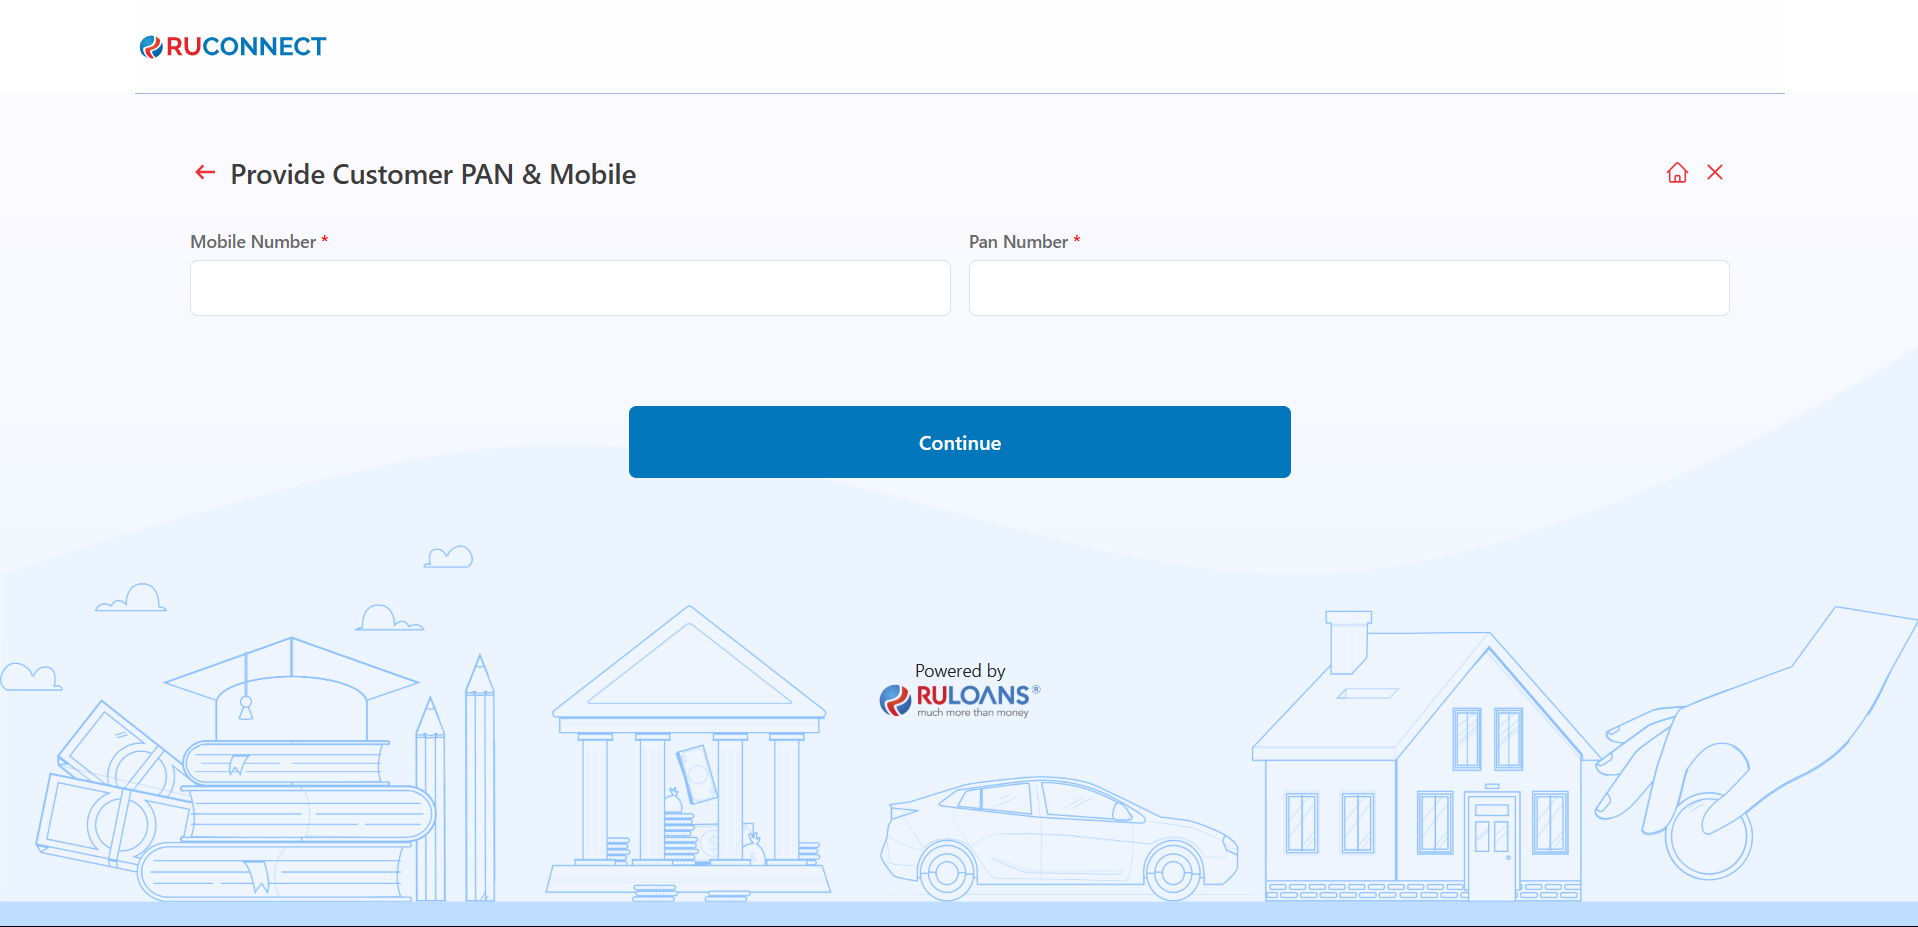
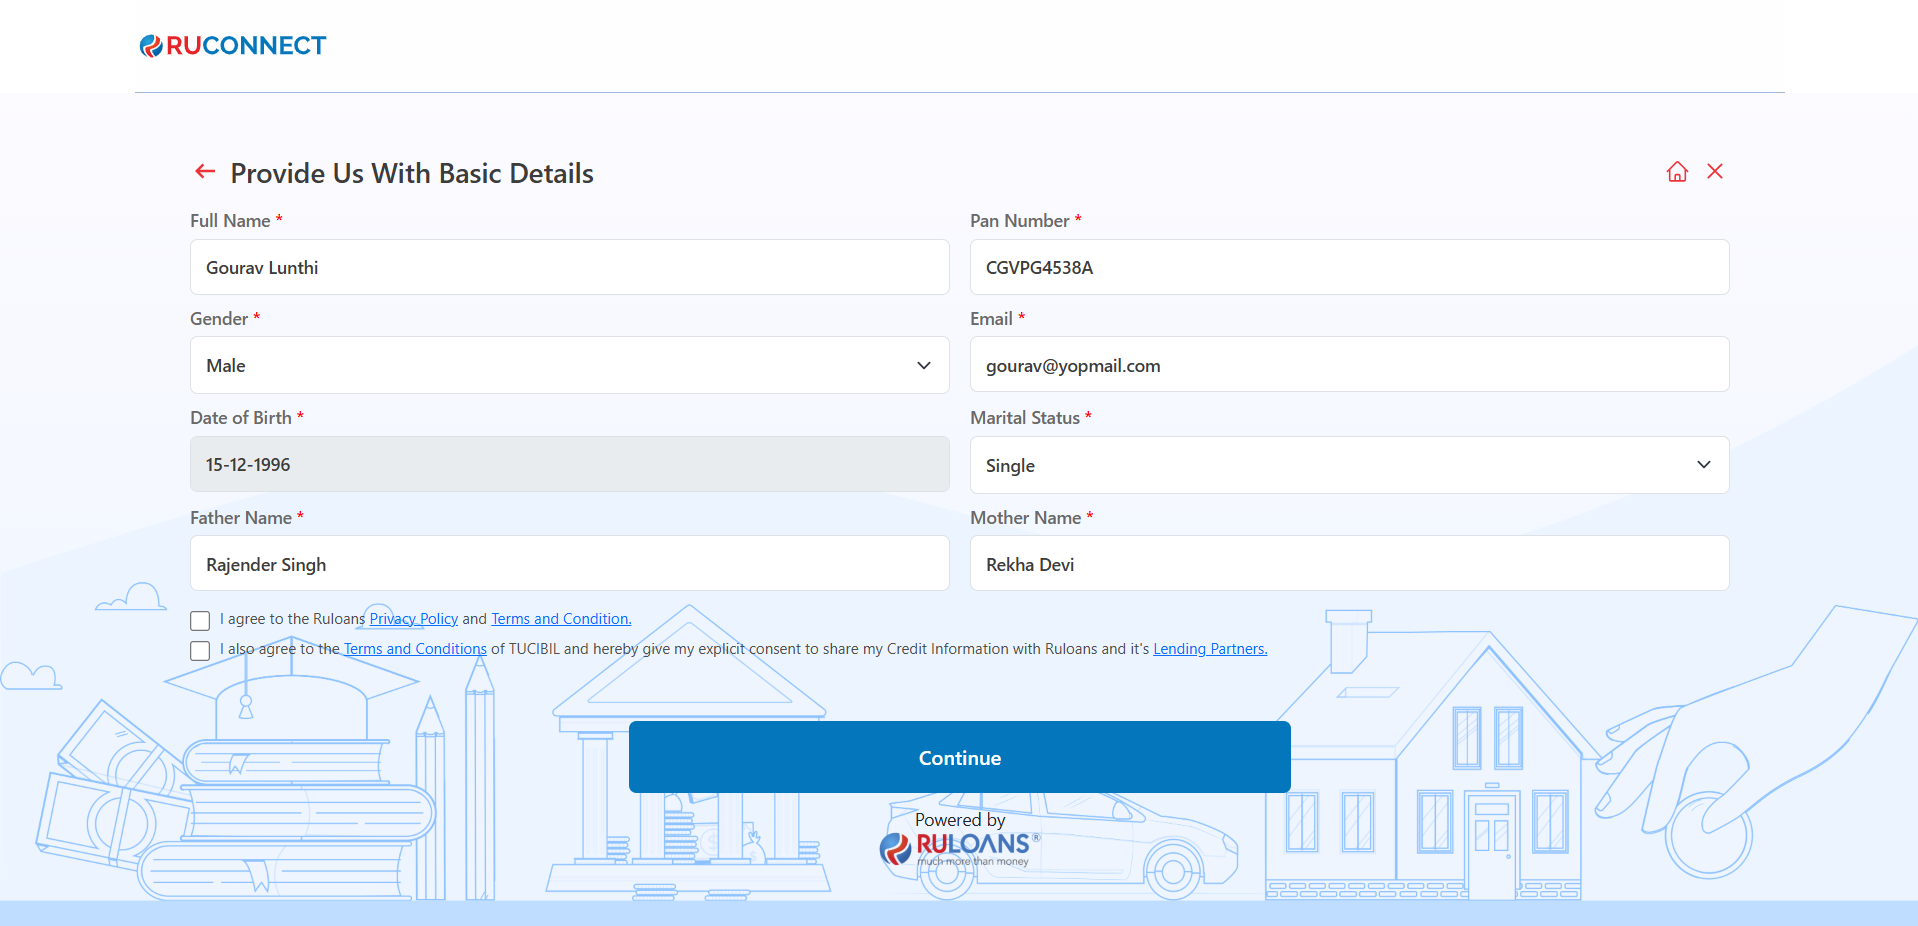
Step 12: Provide Basic Details
- Mandatory Fields:
- Full Name, PAN Number, Gender, Email, Date of Birth, Marital Status, Father’s Name, and Mother’s Name.
- Consent:
- Select checkboxes for Privacy Policy and Credit Information consent.
- Action:
- Click Continue to proceed.
Step 13: OTP Verification
Enter the One-Time Password (OTP) sent to the registered mobile number for verification.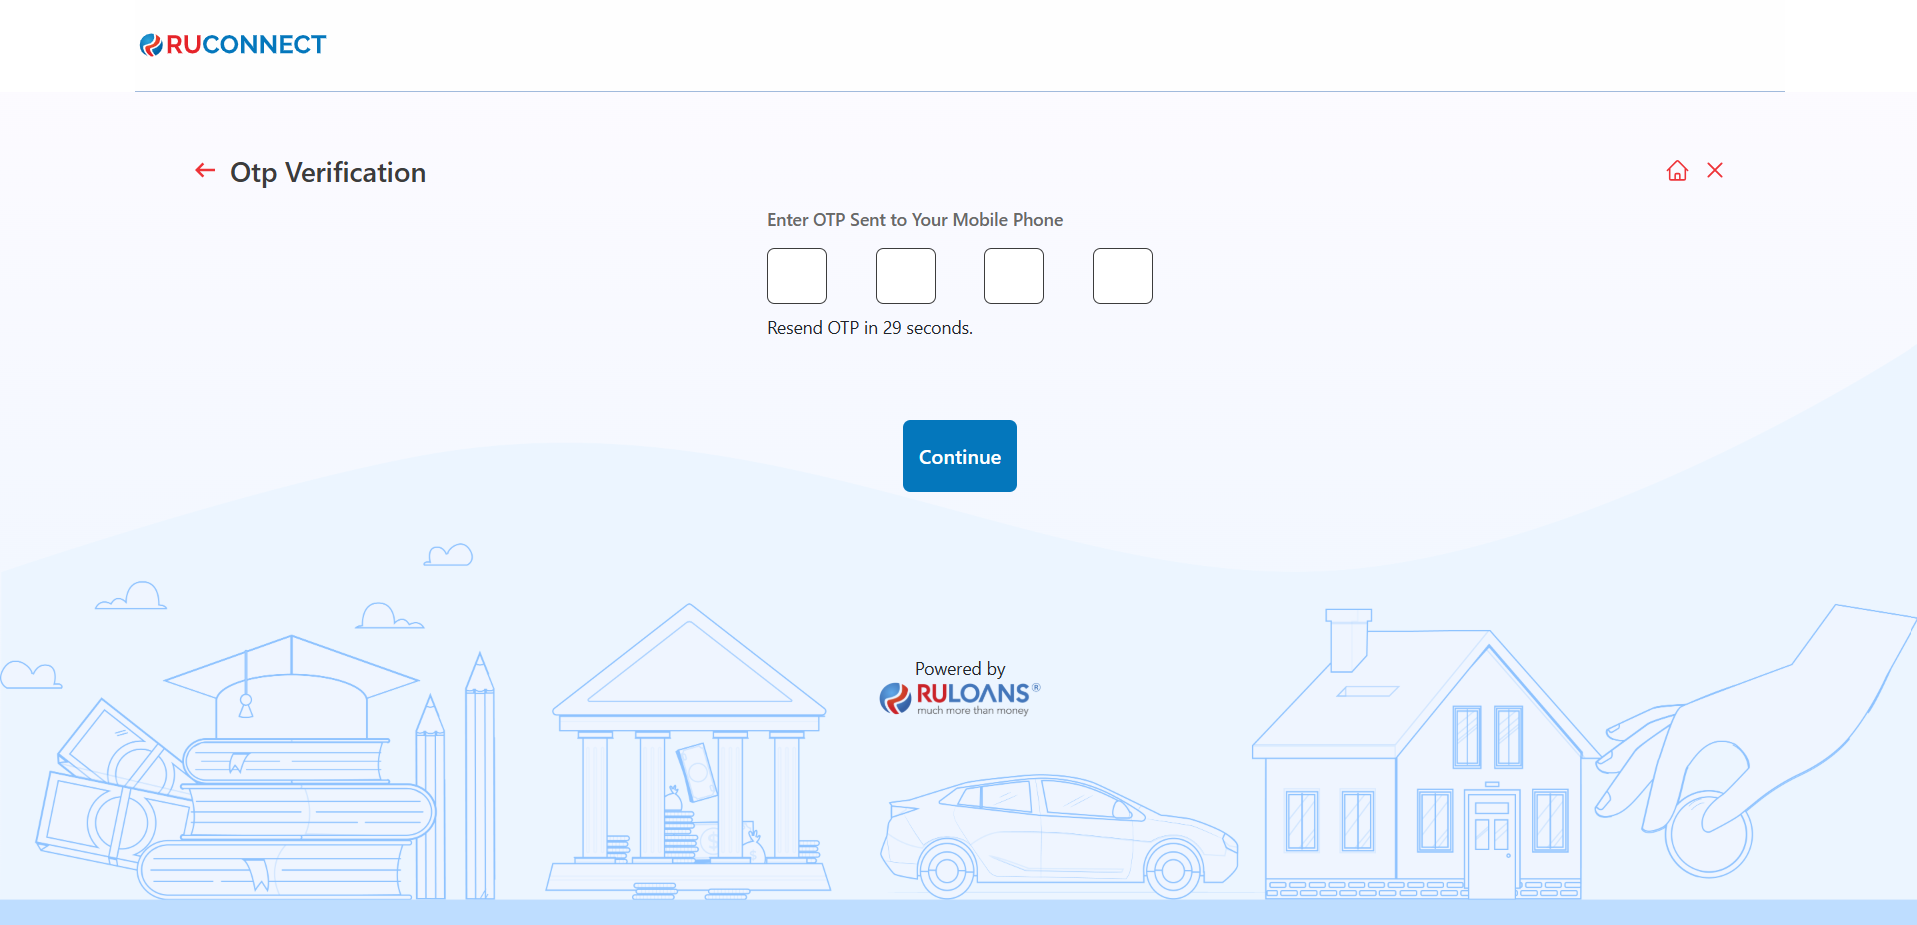
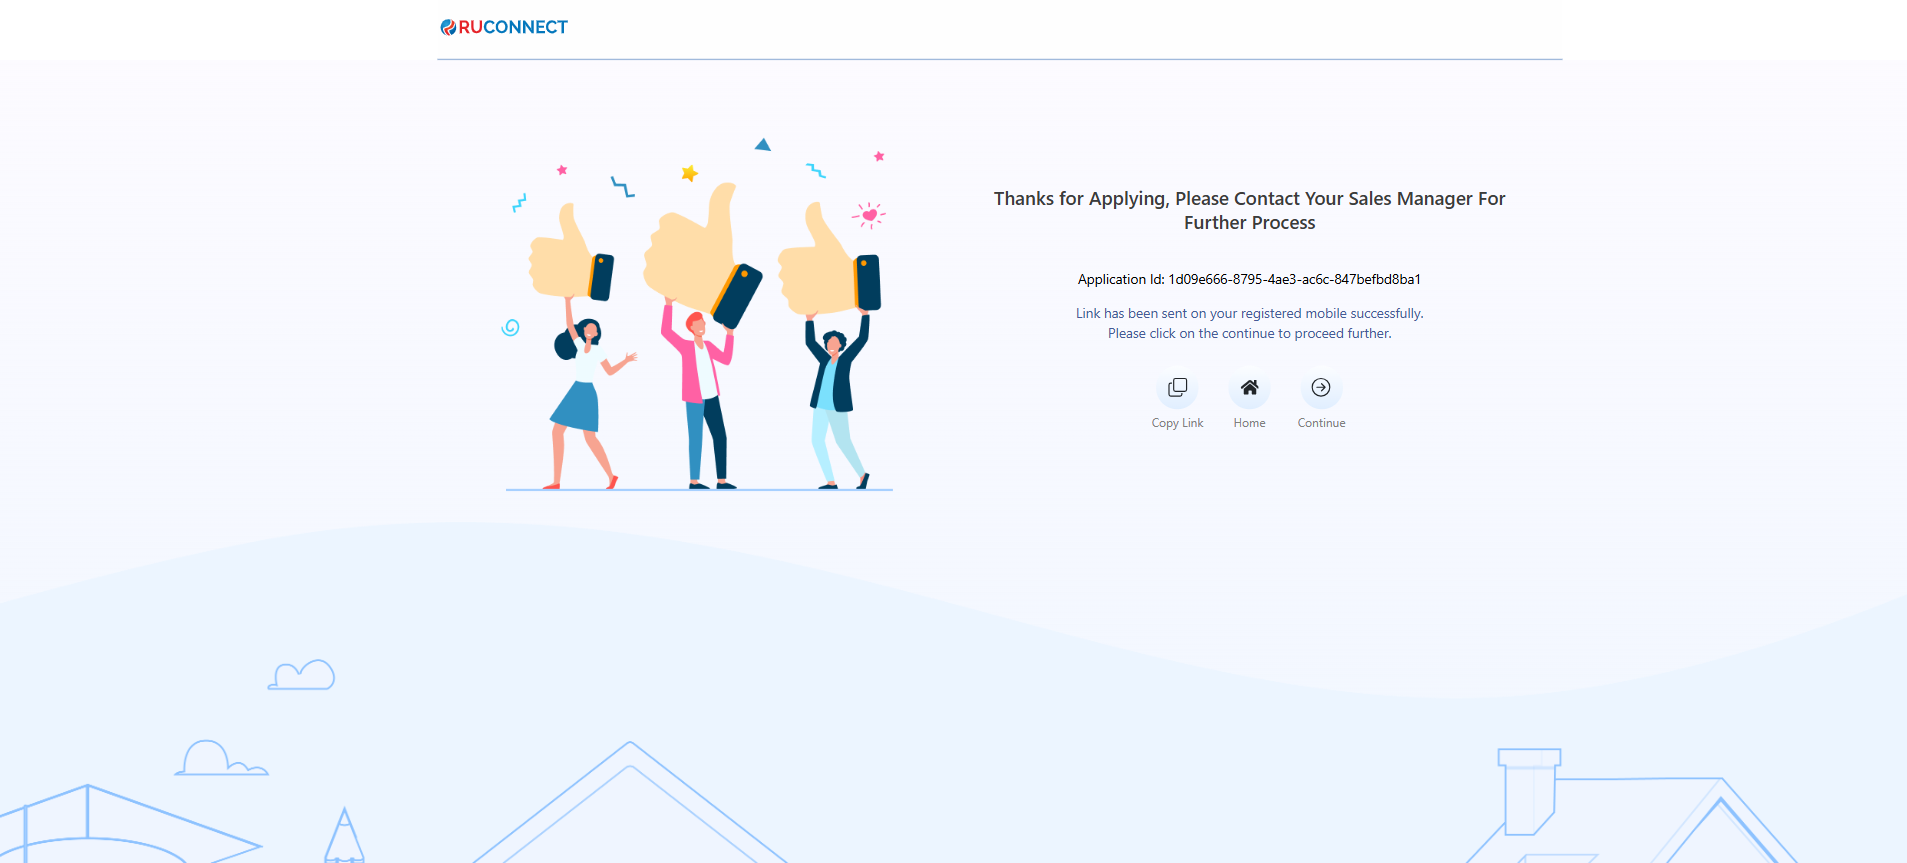
Step 14: Thank You Screen
After sucessfully submit the OTP the user will redirect to the Hero Fincorp platform to complete the another formalities to process their loan and the Thank You screen will appear on the Ruconnect website.